Showing posts with label scrapbooking. Show all posts

Tuesday, September 20, 2016

BoBunny Toy Box Projects

Hello scrappers!


Bobunny's toybox collection is so much fun! The bright colours and paper designs lend themselves to so many childhood themed projects! 

We've had this collection in our stash for a while, just waiting for inspiration to hit! When I saw a photo of a small gift box, I knew that was it. 


I created this box by cutting the template out on my Cricut (Cartridge: Box it up). I measured each side and cut out 4 squares 1/4 inch smaller than the side of the box, from 4 different papers in the collection. 

I edged the squares with chalk for effect, and adhered them to the sides and top of the box. 

For the topper, I threaded some baker's twine through a button and tied it at the top. I adhered it to the lid of the box with liquid glue. 

For the box front, I taped a piece of clear acetate to the inside of the box, covering the circle. I fussy cut some embellishments to decorate.

Finally, I filled it with gummy worms (I may have snuck one...or two!)

This treat box is on it's way to a special kid this week! 

I wasn't done with this collection yet! 

I needed to create a layout using these colours! One of the patterned cardstock sheets has an arrow pattern on it:


I've been wanting to try a lattice style layout for a while, and this paper was perfect for it! 

Here's the layout:


I cut the strips along the lines, and trimmed the top and bottom to define the arrow. I used varying lengths to add some interest. The leftover trim from the arrows were used at the side of the photo. 

I weaved the strips in and out of each other and tried to keep them straight while I glued them down (easier said than done!). 

I thought twine would give some great movement to the layout, especially since it's such a fun photo! The title was letters I had in my stash, and of course no baby layout is complete without some buttons! 

There we have it, another layout down and ready for the album! 

Lori
xo

Thursday, September 15, 2016

Ultimate Luxury Scrapbooking Retreat!

Hello Crafters! 

How does this sound?...

2 nights, 3 days of no kids, no pets, no spouses, just friends and scrapbooking! 

Sounds good so far right? 

Add in a luxurious log-cabin style estate and all your meals and snacks prepared for you! 

Sounds great! But I'm not done yet!..

How about attending a class? On-site scrapbook supply shop? Gorgeous fall scenery?

Sounds fantastic right!? That is exactly what we're bringing to you! 


Grab your comfiest PJ's and slippers cause we're having a slumber party! We've arranged a whole week- end of crafting in  a stunning 4100 sq ft lake front vacation home this fall! We're offering you the opportunity to scrapbook & make new crafty friends over a weekend of luxury, fun and relaxation!

Located in Skead, ON (20 min north of Sudbury), this home boasts indoor & outdoor gourmet kitchens, cozy stone  fireplace, outdoor lounge with heated floors & more! 


Arrive on Friday evening for snacks & scrapping. Scrap all day Saturday, stopping only to eat your meals that will be made for you, and Sunday until we finish off the weekend with a gourmet Sunday brunch! 

Rooms are available for friends to come together as well as solo scrappers. 

Rates as low as $300 for the weekend! 


This is sure to be a weekend you'll want to make a tradition!

Click here to see the sleeping arrangements and other exciting info.

Click here to print the registration form.

Contact us now at admin@worldwidescrapbookingsupplies.com for more information and to register!

See you in the fall!

Lori
xo


Thursday, September 8, 2016

Doodlebug's Anchor's Aweigh Layout!

Hello scrappers!

Doodlebug's 'Anchor's Aweigh' collection has to be one of the cutest nautical collections I've seen! 

This paper has 'boat-themed layout' written all over it! Here's what we created with it:


*The title, sun and crab are not from the Anchor's Aweigh collection. I found them in my stash and knew they'd go great! 

First I started on the hexagon pattern. It may seem like a big job at first, but it's actually pretty easy. Just punch a bunch of hexagons in the paper you're using and lay them out in the general area you want them. The thing is to make absolutely, 100% positive that the first hexagon you glue down is straight. If it's not, it's a ripple effect from there, and they'll all look crooked. It's best to start in a corner. 

The boat and anchor embellishments are actually from the 12x12 quote sheet:


I just trimmed them very carefully, then I  matted them on plain green cardstock. 

Now on to my very favourite part. After I completed the hexagon pattern, it still looked a bit plain to me. Needed something. 

When in doubt....always add baker's twine! 


I used a fine tip adhesive and very carefully glued around the edge of the hexagon and laid the twine into it. I did that on a few hexagons and I think it really stands out! 

I have the perfect picture of my kids on the boat at camp for this layout! 

Thanks for looking! 

Lori
xo


Tuesday, September 6, 2016

DIY Back to School Project Life Card

Hello crafters! 

Project life cards come in so many different varieties and with the most lovely quotes on them! But sometimes, we just can't find the right style we need! 

I created this PL card for a back to school page!


Here's what I used to make it!

The blue polka dot background is Doodlebug Petite Prints, cut to 3x4 inches. I used a corner punch to round the corners. 

The school bus paper is Recollections, cut 1/8" smaller than the Doodlebug. 

I cut a piece of vellum the same width as the school buses, but 1 full inch longer. That way I could fold the vellum around the back of the card to adhere it, and not have adhesive show through. 

I have the DCVW 'The Edumacation Stack' paper pad. This paper pack is awesome! It has glitter and embossing, and has tons of images that you can fussy cut. That's what I used for the pennant banner. They are individual pennants, I just put them together to make the banner. 

The #3 was cut from a Cricut a while ago, and it turned out I didn't need it so I put it away in my stash. It certainly came in handy here! The 'grade' letters are also old letters from my stash. 

Making custom Project Life cards are a great way to use up those small paper scraps and left over letters! 

I hope you enjoy our first Project Life card creation! There will be more to come! 

Lori
xo

Saturday, August 27, 2016

Birthday Layout using the Memory MISTI!

Hello Scrappers!

We're hooked on using our Memory Misti to make our own background papers for our layouts! We used our 12x12 Misti and a balloon stamp to create a birthday rainbow!

Here's the layout!


Here's how I made it! 

I placed a 12x12 sheet of white cardstock in my Memory Misti. I thought balloons would be a great stamp for a birthday layout. This stamp is by Forever in Time.

Starting in the top right corner, I drew a very light pencil line to the bottom left corner. This way I knew that on one side of the line I needed to stamp pink, orange and yellow. On the other side would be green, blue purple. 

In the top left corner I started stamping the balloon in pink, then orange. 


The Misti, leaves a bit of room to stamp around the edge of your paper, which makes it super easy to stamp off the edge a bit. 

I continued down the page, changing colours as needed. 


Once I reached my pencil line, I erased it, and knew it was time to start the green balloons. 

I needed to rotate my cardstock in order to have more room at the edge for the stamp to stick to the Misti. There is a bit more give along the hinge side of the Misti, so I rotated toward that side. 


Before long, the entire page had been stamped in rainbow balloons!


I trimmed 1 inch off of each edge, and cut the cardstock into 4 equal sized squares. 


I chose a sheet of navy blue cardstock for the background, so it would really make the bright colours pop. The frame still seemed a bit unfinished, so I grabbed the twine to create a border. 

I marked the corners using a pencil. Using a hole punch, I punched holes to thread the twine through. I ran the twine through the holes, and taped it to the back of the layout. I'll cover the holes later with an enamel dot. 


The finished border:


I adhered the balloon stamped cardstock squares to the background, and added a photo and title. I used adhesive rainbow enamel dots to cover the holes from the twine. 

Here's the finished layout again!


Layouts that include a lot of stamping are definitely a labour of love, but so worth it in the end! 


Thanks for looking!

Lori
xo

Wednesday, August 24, 2016

Grid Layout & Birthday Card using Echo Parks' Dino Friends


Echo Park Dino Friends Layout & Card

Good morning scrappers!

Dinosaurs never go out of style for children! We had a great time using the Dino Friends collection from Echo Park Paper to create a card and layout!

Let's start with the card!


We started with a 5.5 x 5.5 off white card base. We used paper from the collection for the green mat, and the bottom third of the card. The Dino egg paper has such a great colour palette!

We used plain blue cardstock from our stash and embossed it using the embossing folder that is also part of the Dino Friends collection. It gave a great effect! We used thin yellow washi tape to divide the different papers. 


The collection also features stamps! "Rawr means I love you in dinosaur" is the stamp we used, isn't that the cutest sentiment! 


This card is on it's way to a 'rawrsome' birthday boy this week! 

On to the layout! 

Making a grid layout with blocks of varying sizes is not as much fun as it sounds! Trying to find the right balance of sizes while making sure the edges were even was challenging, but we pulled it off!


We used the same stamp set as the card to embellish the paper. The great thing about this collection is that some of the papers are not dino themed, but still fit in with the theme. 

Another great product in the collection is the chipboard accents. We used one for the 'You are so rawrsome' title at the top! 


My kids & I went to an awesome dinosaur exhibit with animated dinos last year, and got a great family photo that will go great on this layout! 

Thanks for looking!

Lori
xo


Thursday, August 18, 2016

Back to School Scrapbook Titles

Hello Scrapbookers! 

It's almost the most wonderful time of the year again, ...no not Christmas, back to school!!!! Yahoo!

Just kidding, actually, I love having the kids home, no lunches to make, no routines, lots of time just hanging out together. 

But back to school is coming soon for us and has already started for some of you,  so I created a list of some cute scrapbook titles for inspiration for your own back to school layouts!


Now I'm going back to soaking up every ounce of summer that I can before school starts!

How do you feel about back to school, are you putting on your party hat or crying in your lemonade because summer is over?

Happy scrapbooking!

Lori
xo

Friday, August 12, 2016

Using the Memory MISTI for Layouts!

Hello Scrappers!

We are so excited to be sharing this project with you! 

We are big Misti fans over here at WWSS, so when the 12x12 Memory Misti was released, naturally, we were ecstatic! We ordered a bunch in for the shop and of course one for ourselves. We started right away on our first layout!!. Here's the layout we would not have been able to create without the 12x12 Misti!


The filler in the heart was all stamped using the MISTI, as well as the sentiments around the heart. We used Lawn Fawn's 'Little Bundle' stamps. 

Here's how we made this layout and some tips to help you make one too!

We used a Cricut to cut a heart stencil out of 12x12 cardstock. Choose a colour that will contrast your layout background.


We  attached the heart stencil to the white cardstock base using a few small pieces of painters tape. We wrapped them around the edge, on the top of the dark cardstock,  but on the underside of the white cardstock. This way it would stay in place. If the painters tape was to leave any marks, it wouldn't show on the layout. 


We  placed the papers on the MISTI, heart stencil side up and began to place the stamps where we wanted them. 


Here's where you can learn from our mistake! Begin stamping in the spot where you know you will place your photo. There will be a bit of a learning curve with placing all of  the stamps correctly and seeing how far apart you want the images stamped. If you make any mistakes, you can cover them with your photo. 

Once you have all your stamps placed where you want them, lift the Misti lid and ink your stamps, then fold back over to stamp your images. We used a light purple ink and we had to stamp at least twice each time, thank goodness for the Misti or we  wouldn't have been able to stamp in the same spot more than once! Believe me, many mistakes have been made trying to line the stamps up perfectly, grrr.

Here's where it gets a bit tedious. The stamps need to be cleaned after each use or when you try to place the stamps again, you will get the excess ink on your page. We really didn't feel like running to the sink and back every few minutes so we grabbed another one of our new favourite tools...the Lawn Fawn Stamp Shammy! 

At first we was a bit skeptical about this product. "How on earth is that little cloth going to clean the  stamps"? Wouldn't we  just have to clean the cloth afterwards...isn't that extra work!?' Well...nope! This thing is  fantastic. You simply  wet the shammy, ring out the excess water and wipe your stamps clean. That's it. The ink that the shammy picks up does not transfer back onto your stamps. 

That is  a 100% unpaid, unsolicited review! The shammy really is just that fantastic! 


Back to the layout.. lol, 

We kept on repeating the process until the entire heart was filled with the stamped images. It took quite a while, but we put some music on, closed the studio door and  actually found it to be quite relaxing. 


The finished heart! Turned out great!

The heart turned out exactly as we had envisioned. The edges looked a bit unfinished  though, it need a little something. What goes better on a baby layout than some hand stitching?


We  put a piece of 1/2" thick craft foam under the layout and used a sewing needle to pierce holes about 1/4" apart. We used pink embroidery floss and stitched around the heart. We were really pleased with the result. 


We  felt the edge still needed a little something though. We knew turquoise would be an accent colour on this layout so out came the stamps again! Here's where the Misti really proved it's worth again. 


Once again, we placed the stamps where we wanted them on the layout and picked them up using the Misti. We wanted the sentiment to curve around the heart, something else we wouldn't have been able to do without the Misti. 


Turned out perfect! We stamped a few more sentiments. Now to embellish the layout & add the photo! 

We trimmed the edges 1/4" on each side and added a pink background paper to create a border. 

We added a title, some flowers and called it a day! I really wanted the stamped heart to be the focus of the layout. Mission accomplished!

The Memory Misti, the Lawn Fawn 'Little Bundle' set and Stamp Shammy are available in the shop. (Don't forget you get free shipping within Canada when you purchase the Memory Misti!)

We would love to see your ideas for using the Memory Misti for scrapbook layouts! Please share below!

Whew!!


Lori
xo

Friday, August 5, 2016

Crate Paper Farmhouse Layout

Good Morning Scrappers!

For us, fall is all about family time and getting the little ones out to enjoy the cool weather before the snow sets in. Every year we visit a local farm to get some fresh produce, take a hay ride and pick some pumpkins. 

As soon as I saw these journaling cards from Crate Paper's Farmhouse Collection,  I knew they would be perfect for scrapping our trip to the farm last fall! 


I love using journaling cards on layouts because they add clean lines to start with, which allows you to  build on top of that. I picked 6 cards from this sheet that I thought would go well together. I'll use the others for other layouts or cards. 


I placed the cards on the layout, and used my grid crafting mat to ensure they were even and straight. I shopped through my stash to see what I already had that would fit the theme. 

Wood embellishments go great with this collection because the color palette is very outdoorsy (is that a word!?).

I used some washi tape to embellish two of the cards, and a few metal pieces to add depth. 

The title 'blessed' is from the Simple Stories 'We are Family' collection. The colors of that collection also work well here. 

This fall will, of course, include another trip to the farm for pumpkin collecting! Do you pick your own pumpkins in the fall?

Lori
xo


Friday, July 29, 2016

Echo Park - Little Man Mini Album


Good Morning Crafters!

Today I'm going to show you a mini album I made using Echo Park's Little Man collection that was released in October 2015. I knew as soon as I saw this collection it would make a perfect mini album!

I love this collection because it just screams little boy! Its full of frogs, trucks, dinosaurs and toys! The collection included vibrant patterned cardstock, journaling cards, alphabet stickers and an elemental sticker sheet. I used about half of the collection on this album. 

I used a basic 6x6 cardboard album from Michaels, and didn't have a sketch or plan in mind. I was going to take a cue from my little guy and fly by the seat of my pants!


I created the cover first. I just loved the boy on the skateboard sticker, and knew it would be perfect for the cover! The alpha stickers with the stitched look were just the right size, and they looked great!


The first 2 pages can feature 3 photos,  I absolutely love the alphabet block cardstock! 

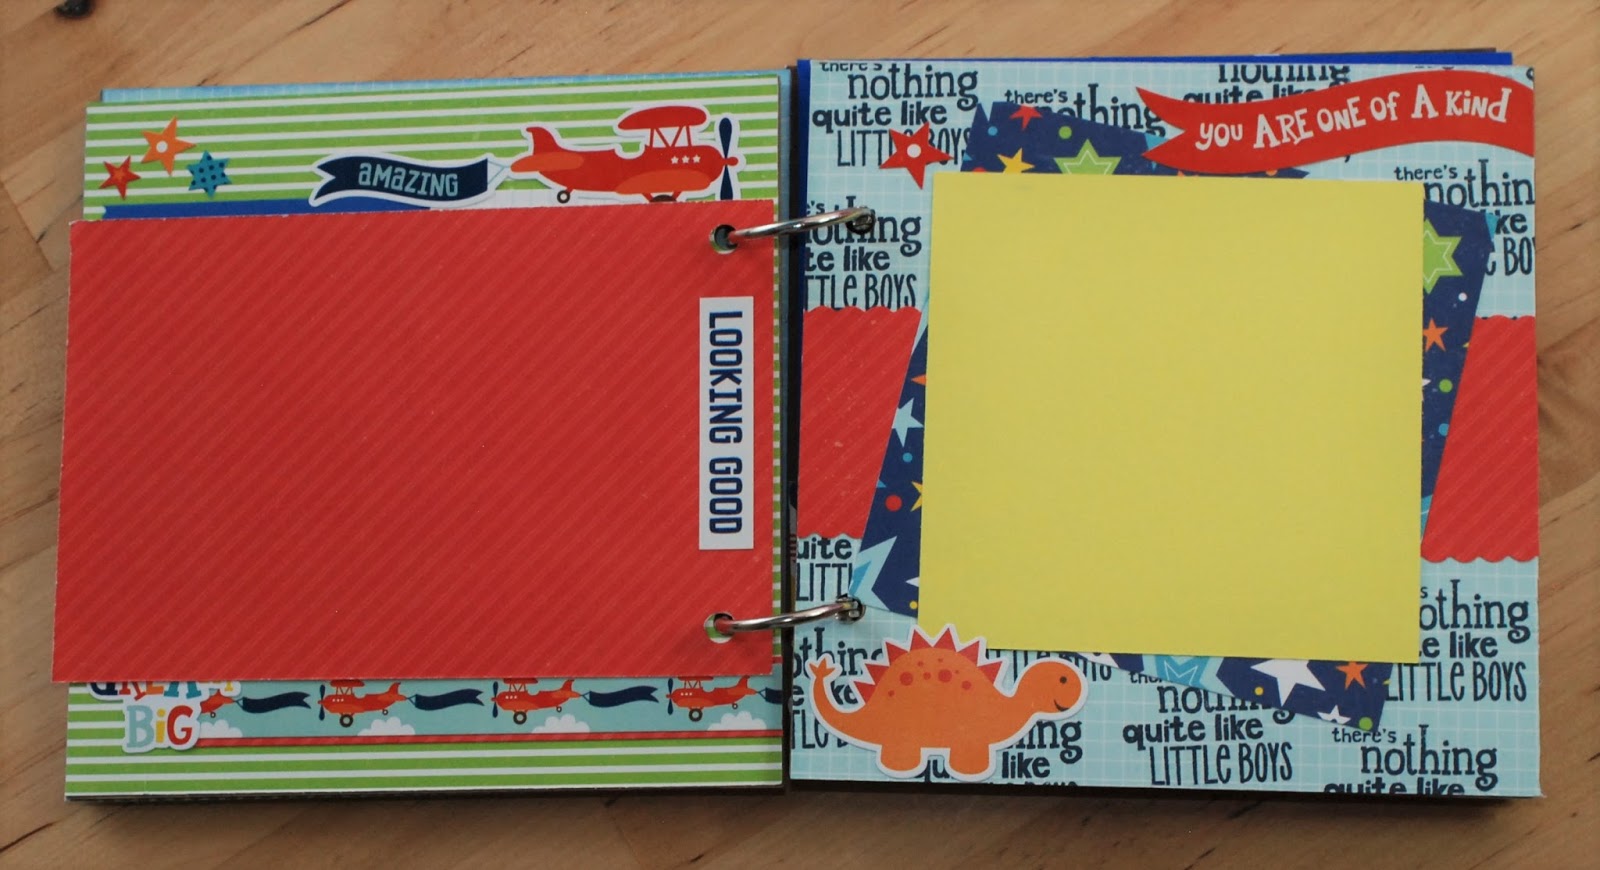
The collection features cardstock and stickers with an airplane theme. One of the cardstock sheets includes 6 4x6 journaling cards. On the back of 'little boys are the best' is patterned red cardstock, so I punched 2 holes in the card and left the back blank to add a trimmed down photo. 

Echo Park also has stamps in the Little Man theme. 
I used the 'There's nothing quite like little boys' stamp to create my own patterned cardstock, The collection includes such adorable stickers, like that orange dinosaur! 


For the next page, I wanted to add a little something extra. Echo Park's Pinstripes & Petticoats collection included a rocket ship embossing folder. 


I used this folder to emboss a sheet of plain red cardstock, to give a great effect to the background! I really wanted to maximize the amount of photos that could be included in the album, so I adhered washi tape in a bright colour to 2 squares of cardstock and used the washi tape to also adhere them to the embossed cardstock, creating a mini album, in my mini album!

The next page shows you that with a simple run around the edges of a solid cardstock sheet with patterned edge scissors can give a finished look to your photo mats! 

For these pages I used the label stickers to create a border around the page. I place a piece of cardstock over half of the 'Boys Rule' sticker so I could easily slip a photo in there. The collection also includes a sheet of 3x4 journaling cards. I knew this one would be perfect the album. 


The back of the journaling card featured a star cardstock, I left it blank so I could add a small photo there. I used more of the large stitched letters and some of the small alpha stickers to create a custom border on the next photo mat. 


I loved that the collection included lots of sentiment stickers, They were big enough to stand out but small enough for a mini album! 


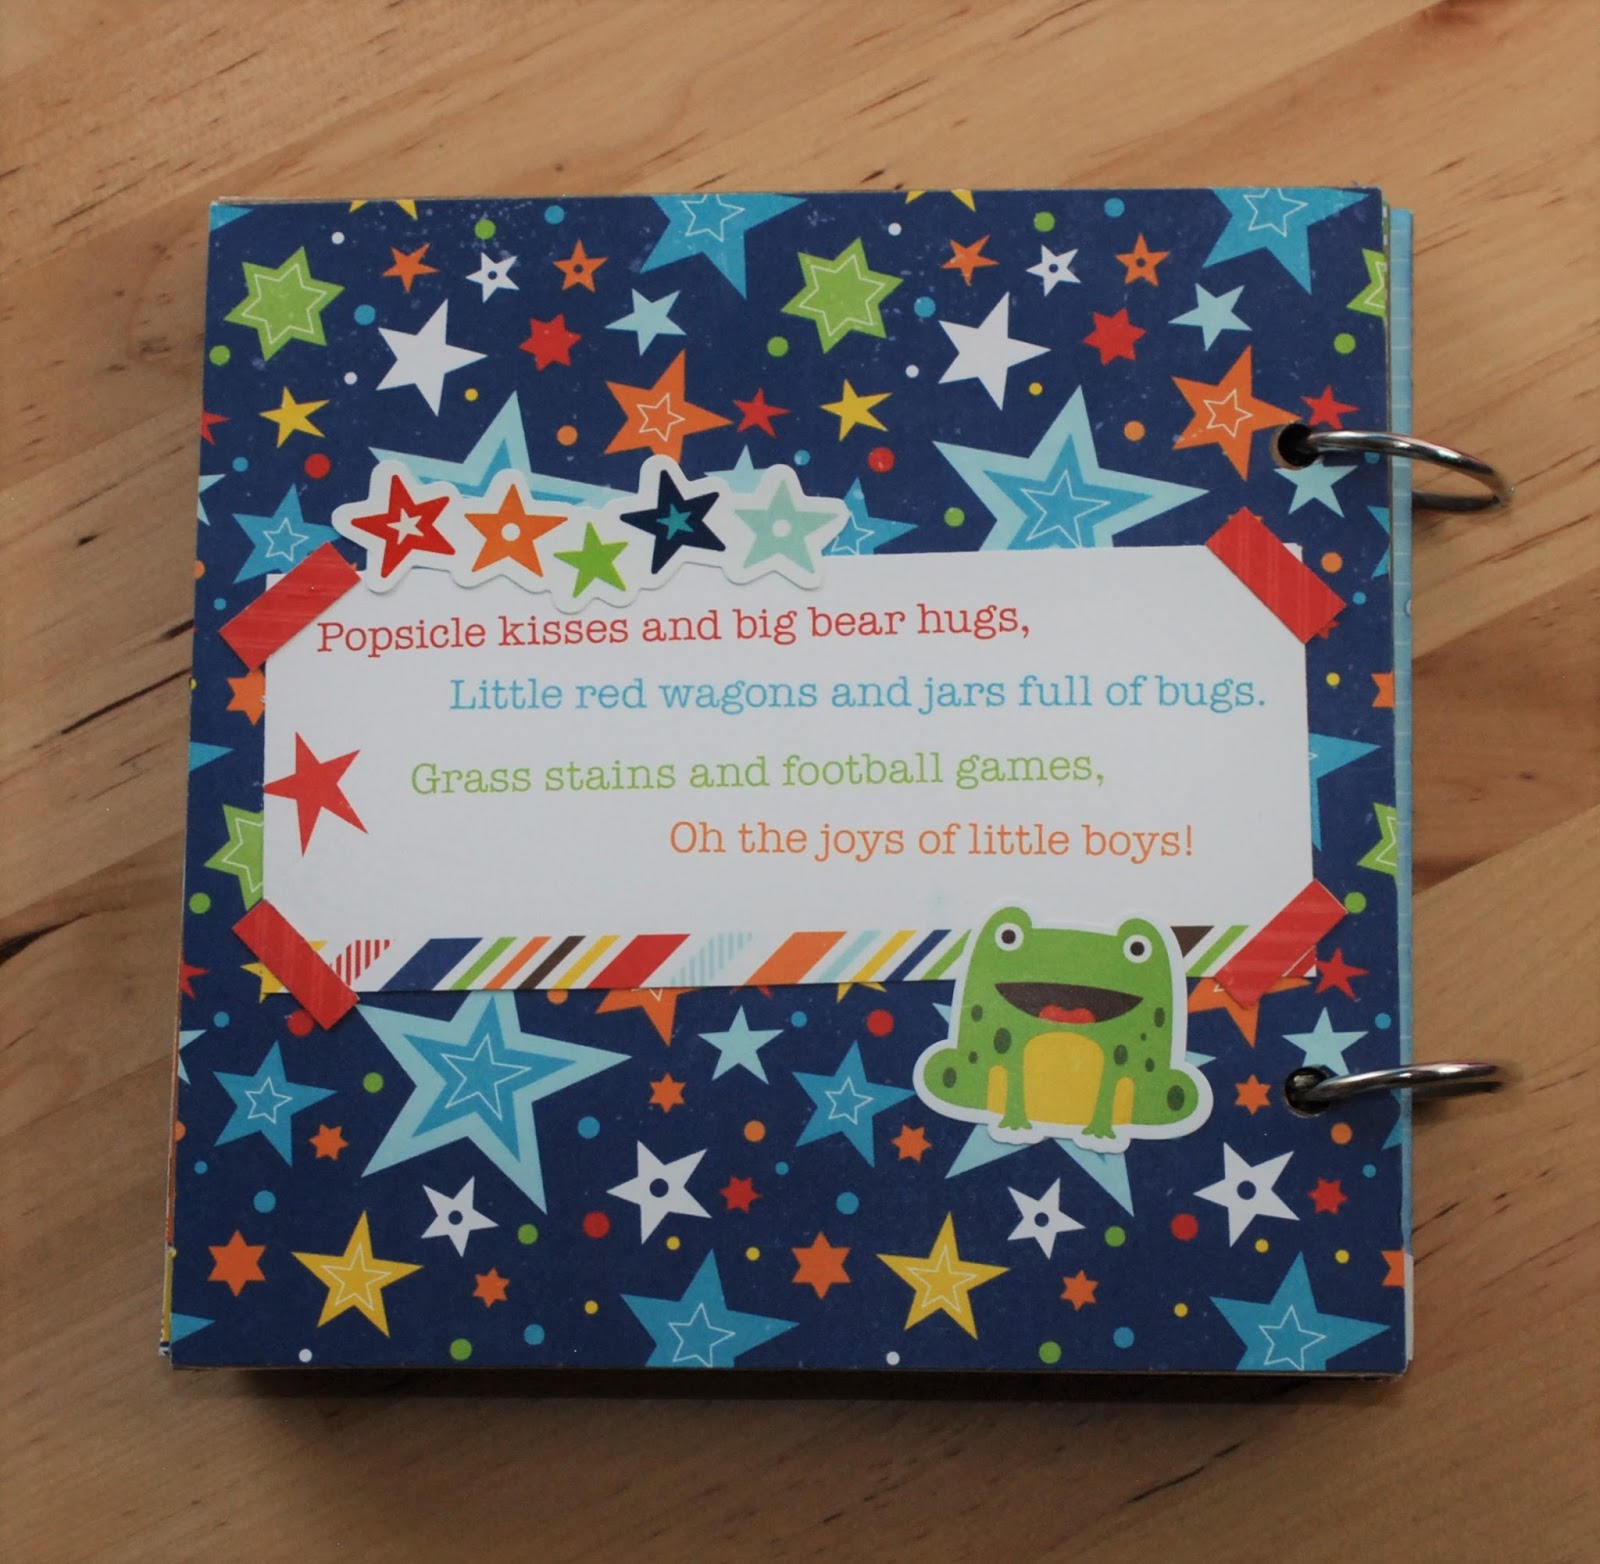
For the back of the album, I wanted something that would remind me of all the fun and excitement a little boy brings. This quote was included on one of the cardstock sheets, and fit the feel of the album perfectly! 


I hope you enjoyed this little man themed mini album! Check out worldwidescrapbookingsupplies.com to purchase the Little Man collection!

Have a great long weekend everyone!

Lori
xo